Product demo.
  What is data observability?
  What is a data mesh--and how not to mesh it up
  The ULTIMATE Guide To Data Lineage
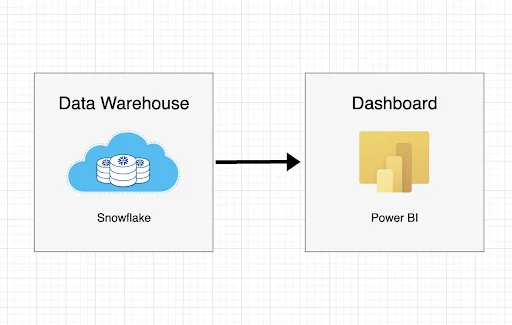
 How to Quickly Connect Power BI to Snowflake

Michael Segner
Michael writes about data engineering, data quality, and data teams.
In Power BI, you can connect to a Snowflake warehouse to dissect and visualize the underlying data just like any other data source. This process is simple and relatively straightforward.
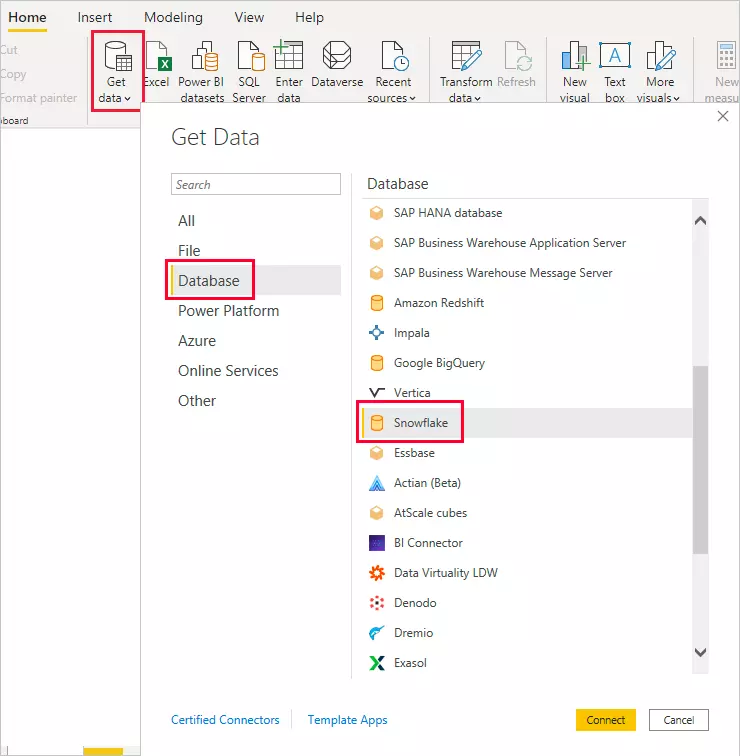
Step 1 – Choose the Snowflake Connector
After you have Power BI Desktop open, click Get Data from the Home ribbon menu. In the Database category on the left sidebar, click Snowflake. Next, click Connect.
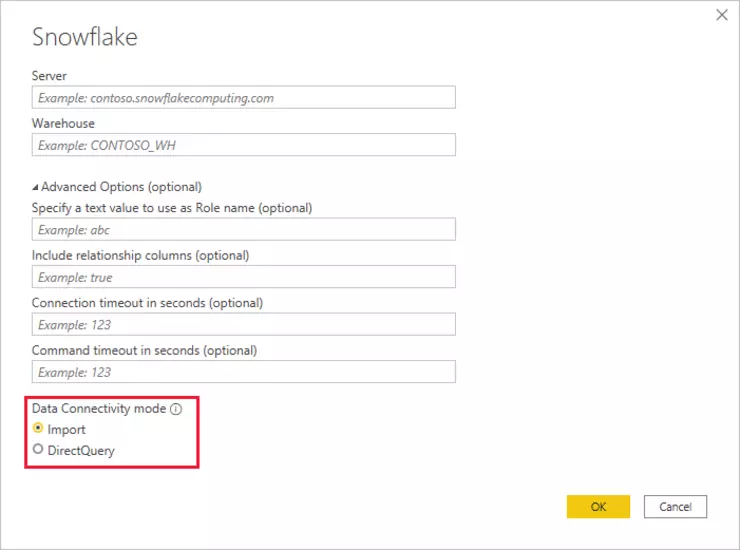
Step 2 – Identify which Snowflake warehouse you want to connect to
At the Snowflake window, enter the server address (ie the URL that you use to access Snowflake) you want to connect to and the compute warehouse that you’ll use for queries.
After filling out the Server, Warehouse, and any Advanced Options, you’ll notice two options for querying your data underneath “Data Connectivity mode.” You can choose to Import data directly into Power BI, or you can use DirectQuery.
Here are the differences between selecting Import and DirectQuery:
- Import: The dataset is imported into Power BI and as you create or interact with a visualization, Power BI uses the imported data. To see underlying data changes since the initial import or the most recent refresh, you must refresh the data, which imports the full dataset again. A benefit of this option may include faster querying times and the ability to join with other external datasets, but shouldn’t be used on datasets that are consistently (ie intraday) being updated to make decisions on the fly.
- DirectQuery: No data is imported or copied into Power BI, rather as you create or interact with a visualization, Power BI queries the underlying data source, so you’re always viewing current data. One limitation here may be slower performance, particularly in case of a shared compute warehouse on the Snowflake side, as well as limited access to functions in PowerBI. This will be the preferred option for analytics teams that need the most up-to-date view of their business.
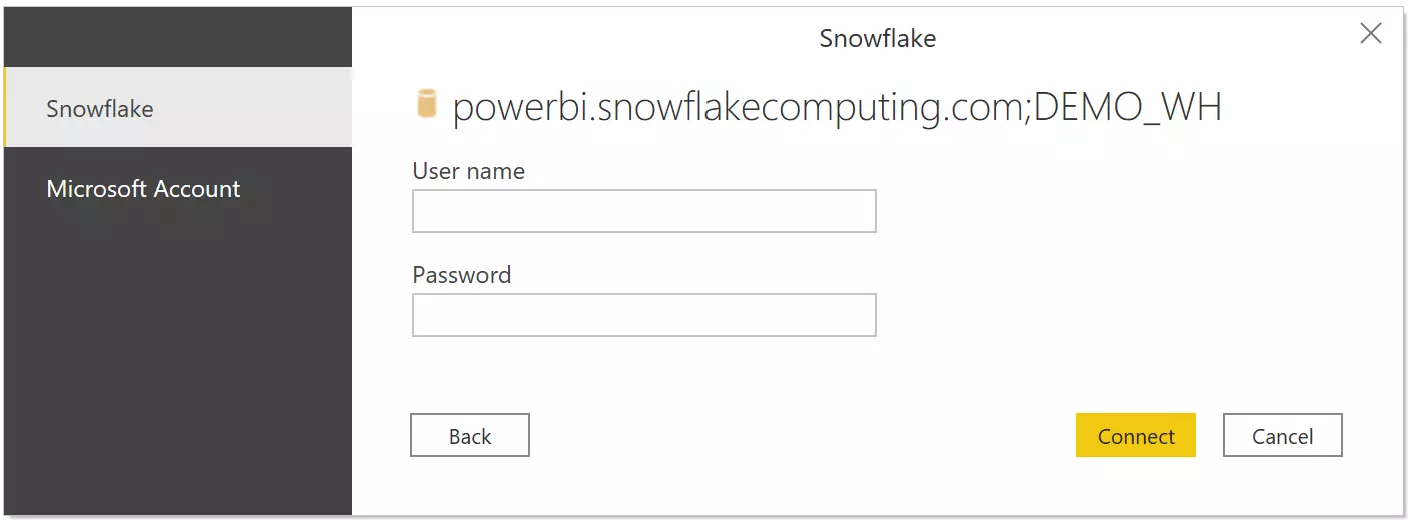
Step 3 – Enter your Snowflake credentials
Next, enter your username and password and click Connect.
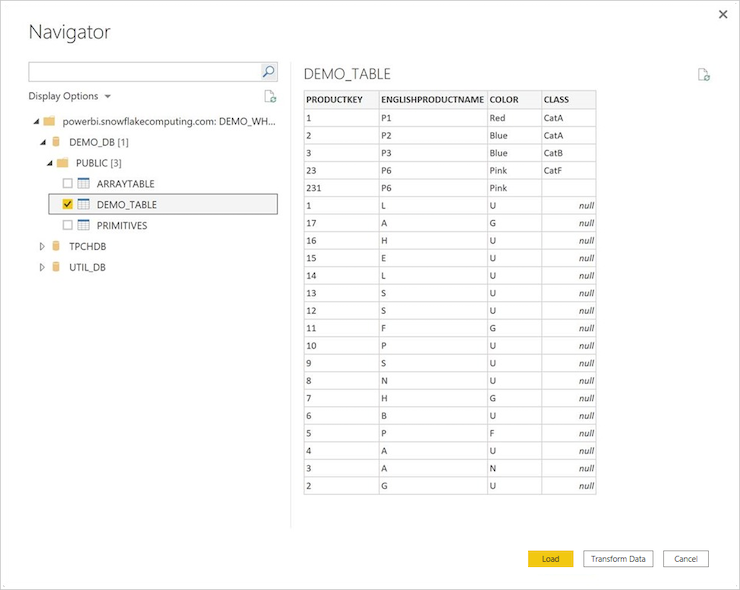
Step 4 – Select which tables you want to analyze
Once you’re connected, you can select one or more tables to import from the Navigator window.
Here are the differences between selecting Load and Transform Data:
- Load: The entire table selected is brought into Power BI as-is.
- Transform Data: You can filter and refine the data in the table by using the Power Query Editor before loading the refined set of data into Power BI.
Happy analyzing!
If you see data that looks inaccurate, you should consider a data observability platform so you don’t experience broken dashboards. Schedule some time to speak with us using the form below:
Our promise: we will show you the product.
Read more posts.